
Override Triggers for a Person in Unit
- Kelly Fraser (Unlicensed)
Analytics
To override a trigger for a person within a unit we start by navigating to the "Units" page from the side menu - ORGANISATION > UNITS

For ease of use, we have designed and developed two individual views to suit your preferences being a GRID and a LIST view as indicated below.
To allow users to navigate and operate the user-interface quickly and more efficiently, we have enabled shortcuts on both views.
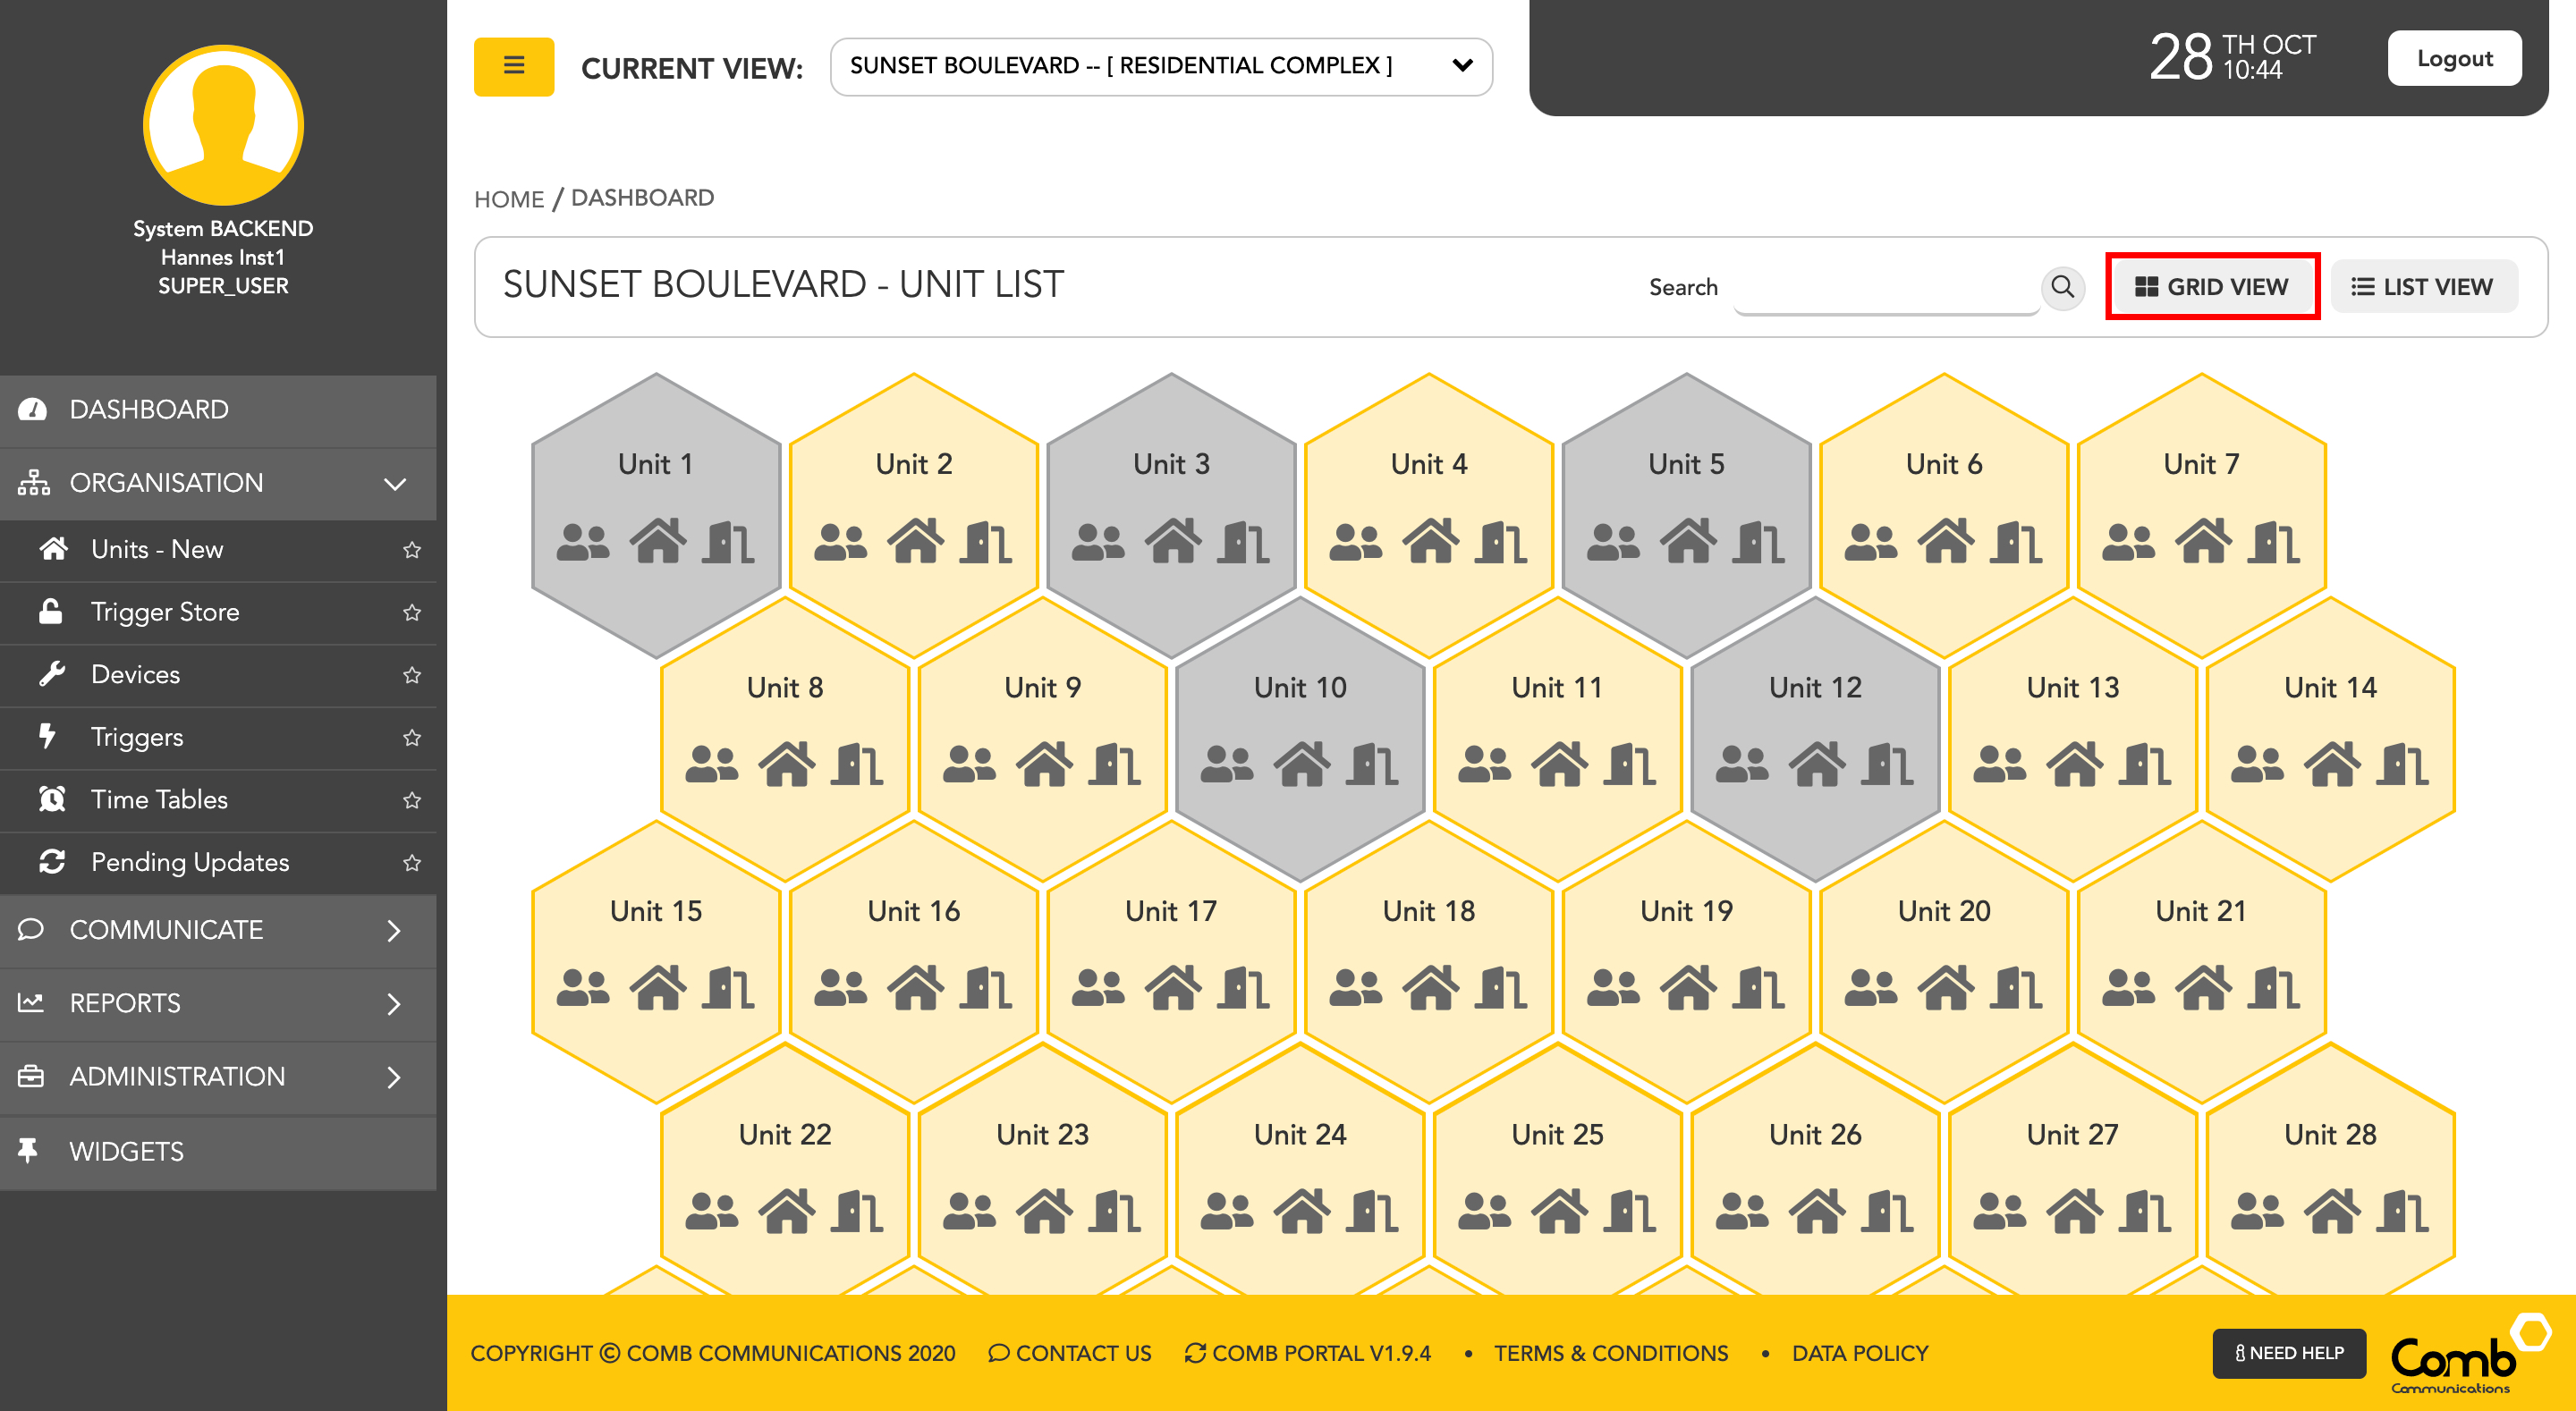
Let's go through how to override a trigger for a person in a unit using the GRID view.
1: First, navigate to the unit in which you want to override a trigger and click on the Authenticators (door) icon as indicated below. This will open the Authenticators pop-up.
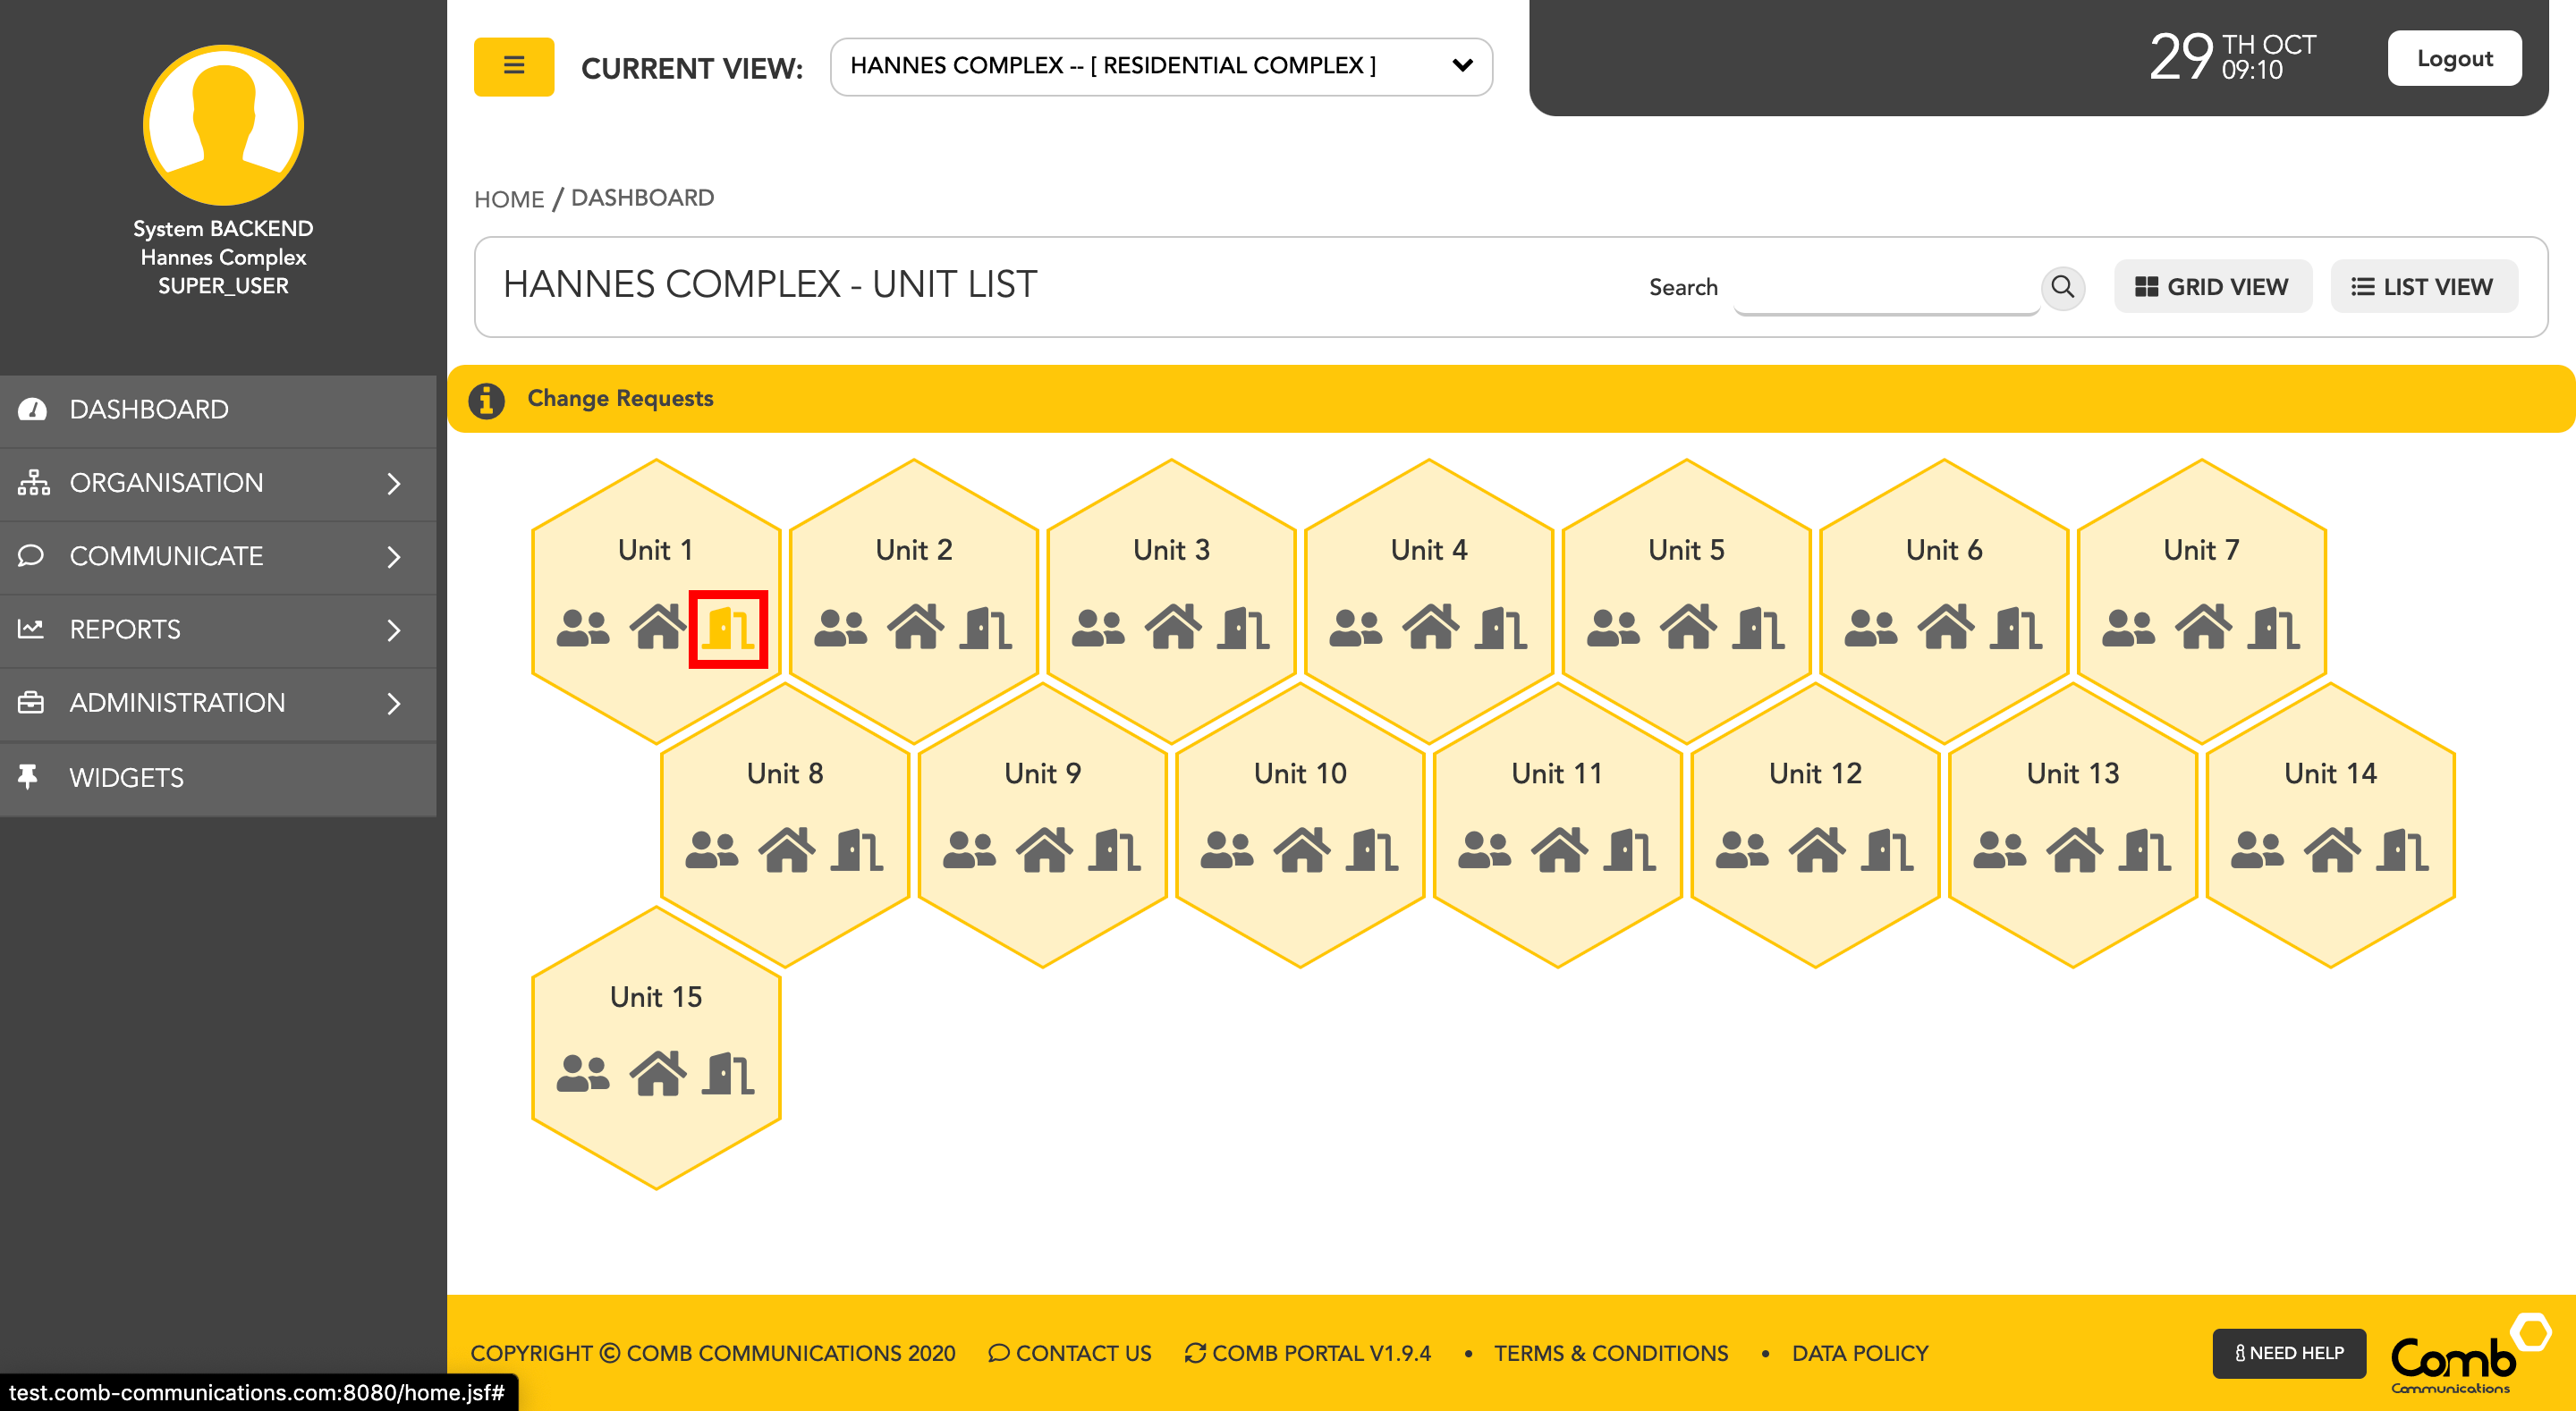
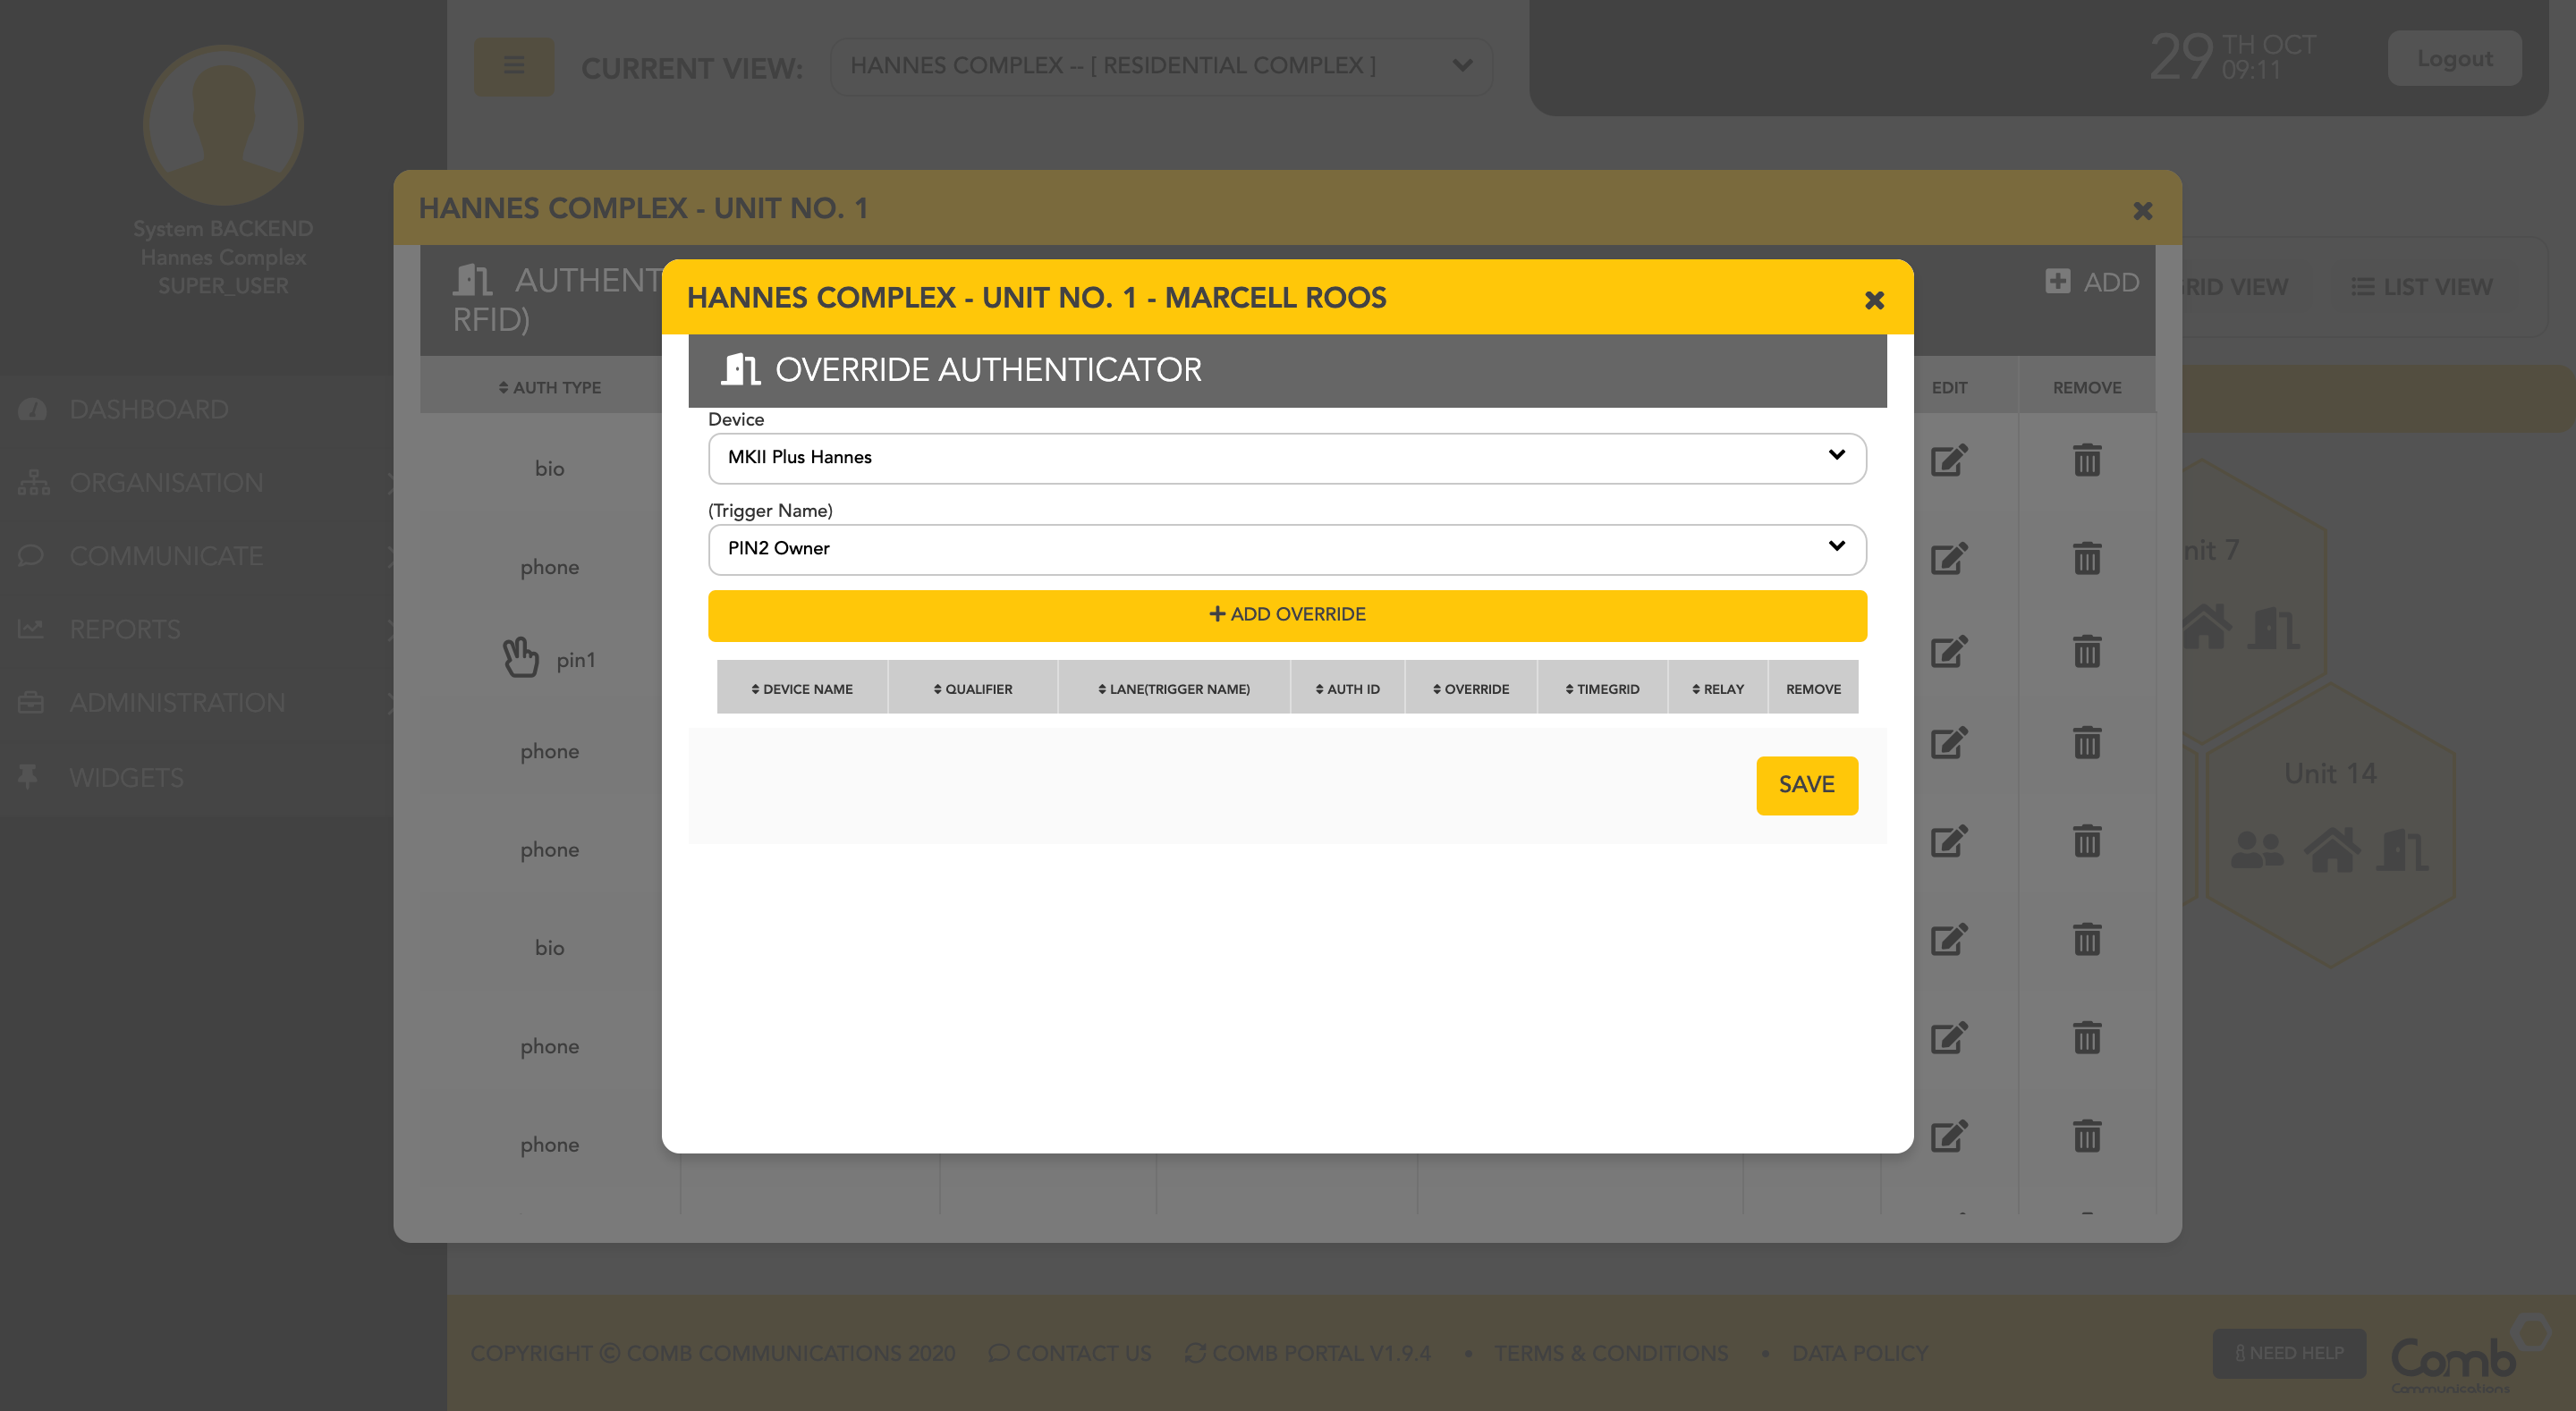
2: Navigate to the authenticator you would like to override and click the associated override icon as indicated below. This will open the "Override authenticator" pop-up.

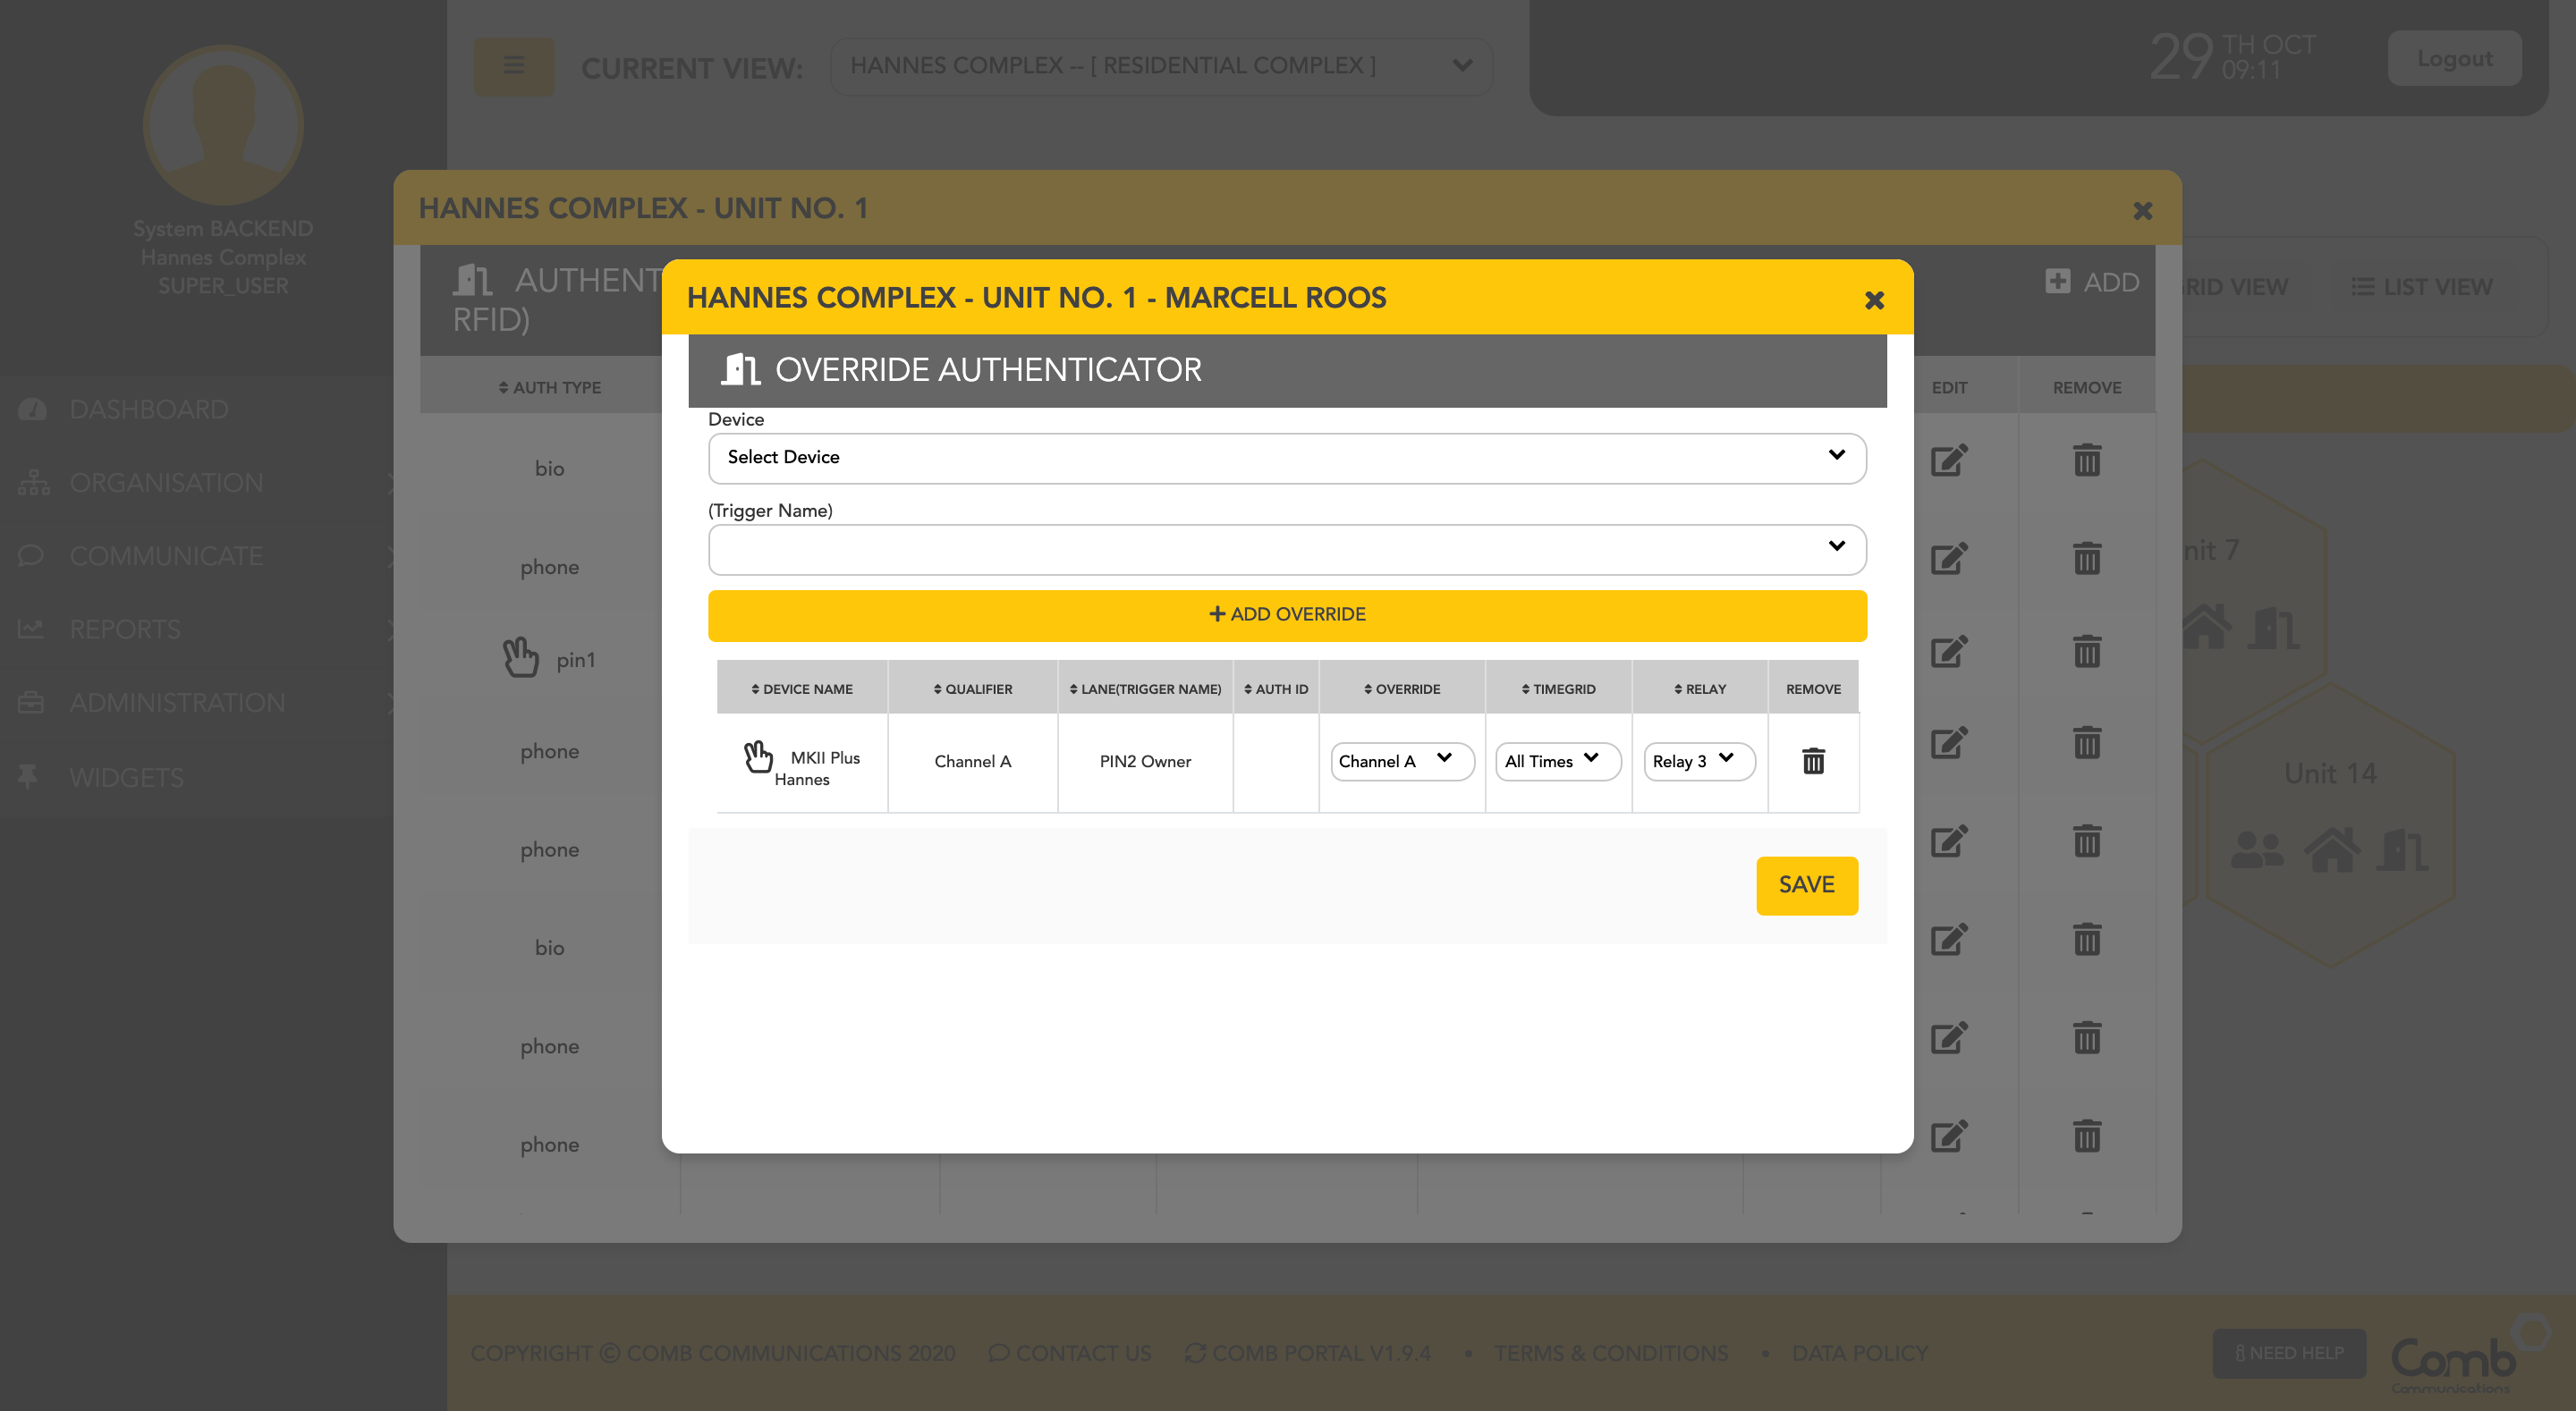
3: Select the "Device" and "Trigger name" from the dropdown menus and then click the "+ADD OVERRIDE" button to continue.
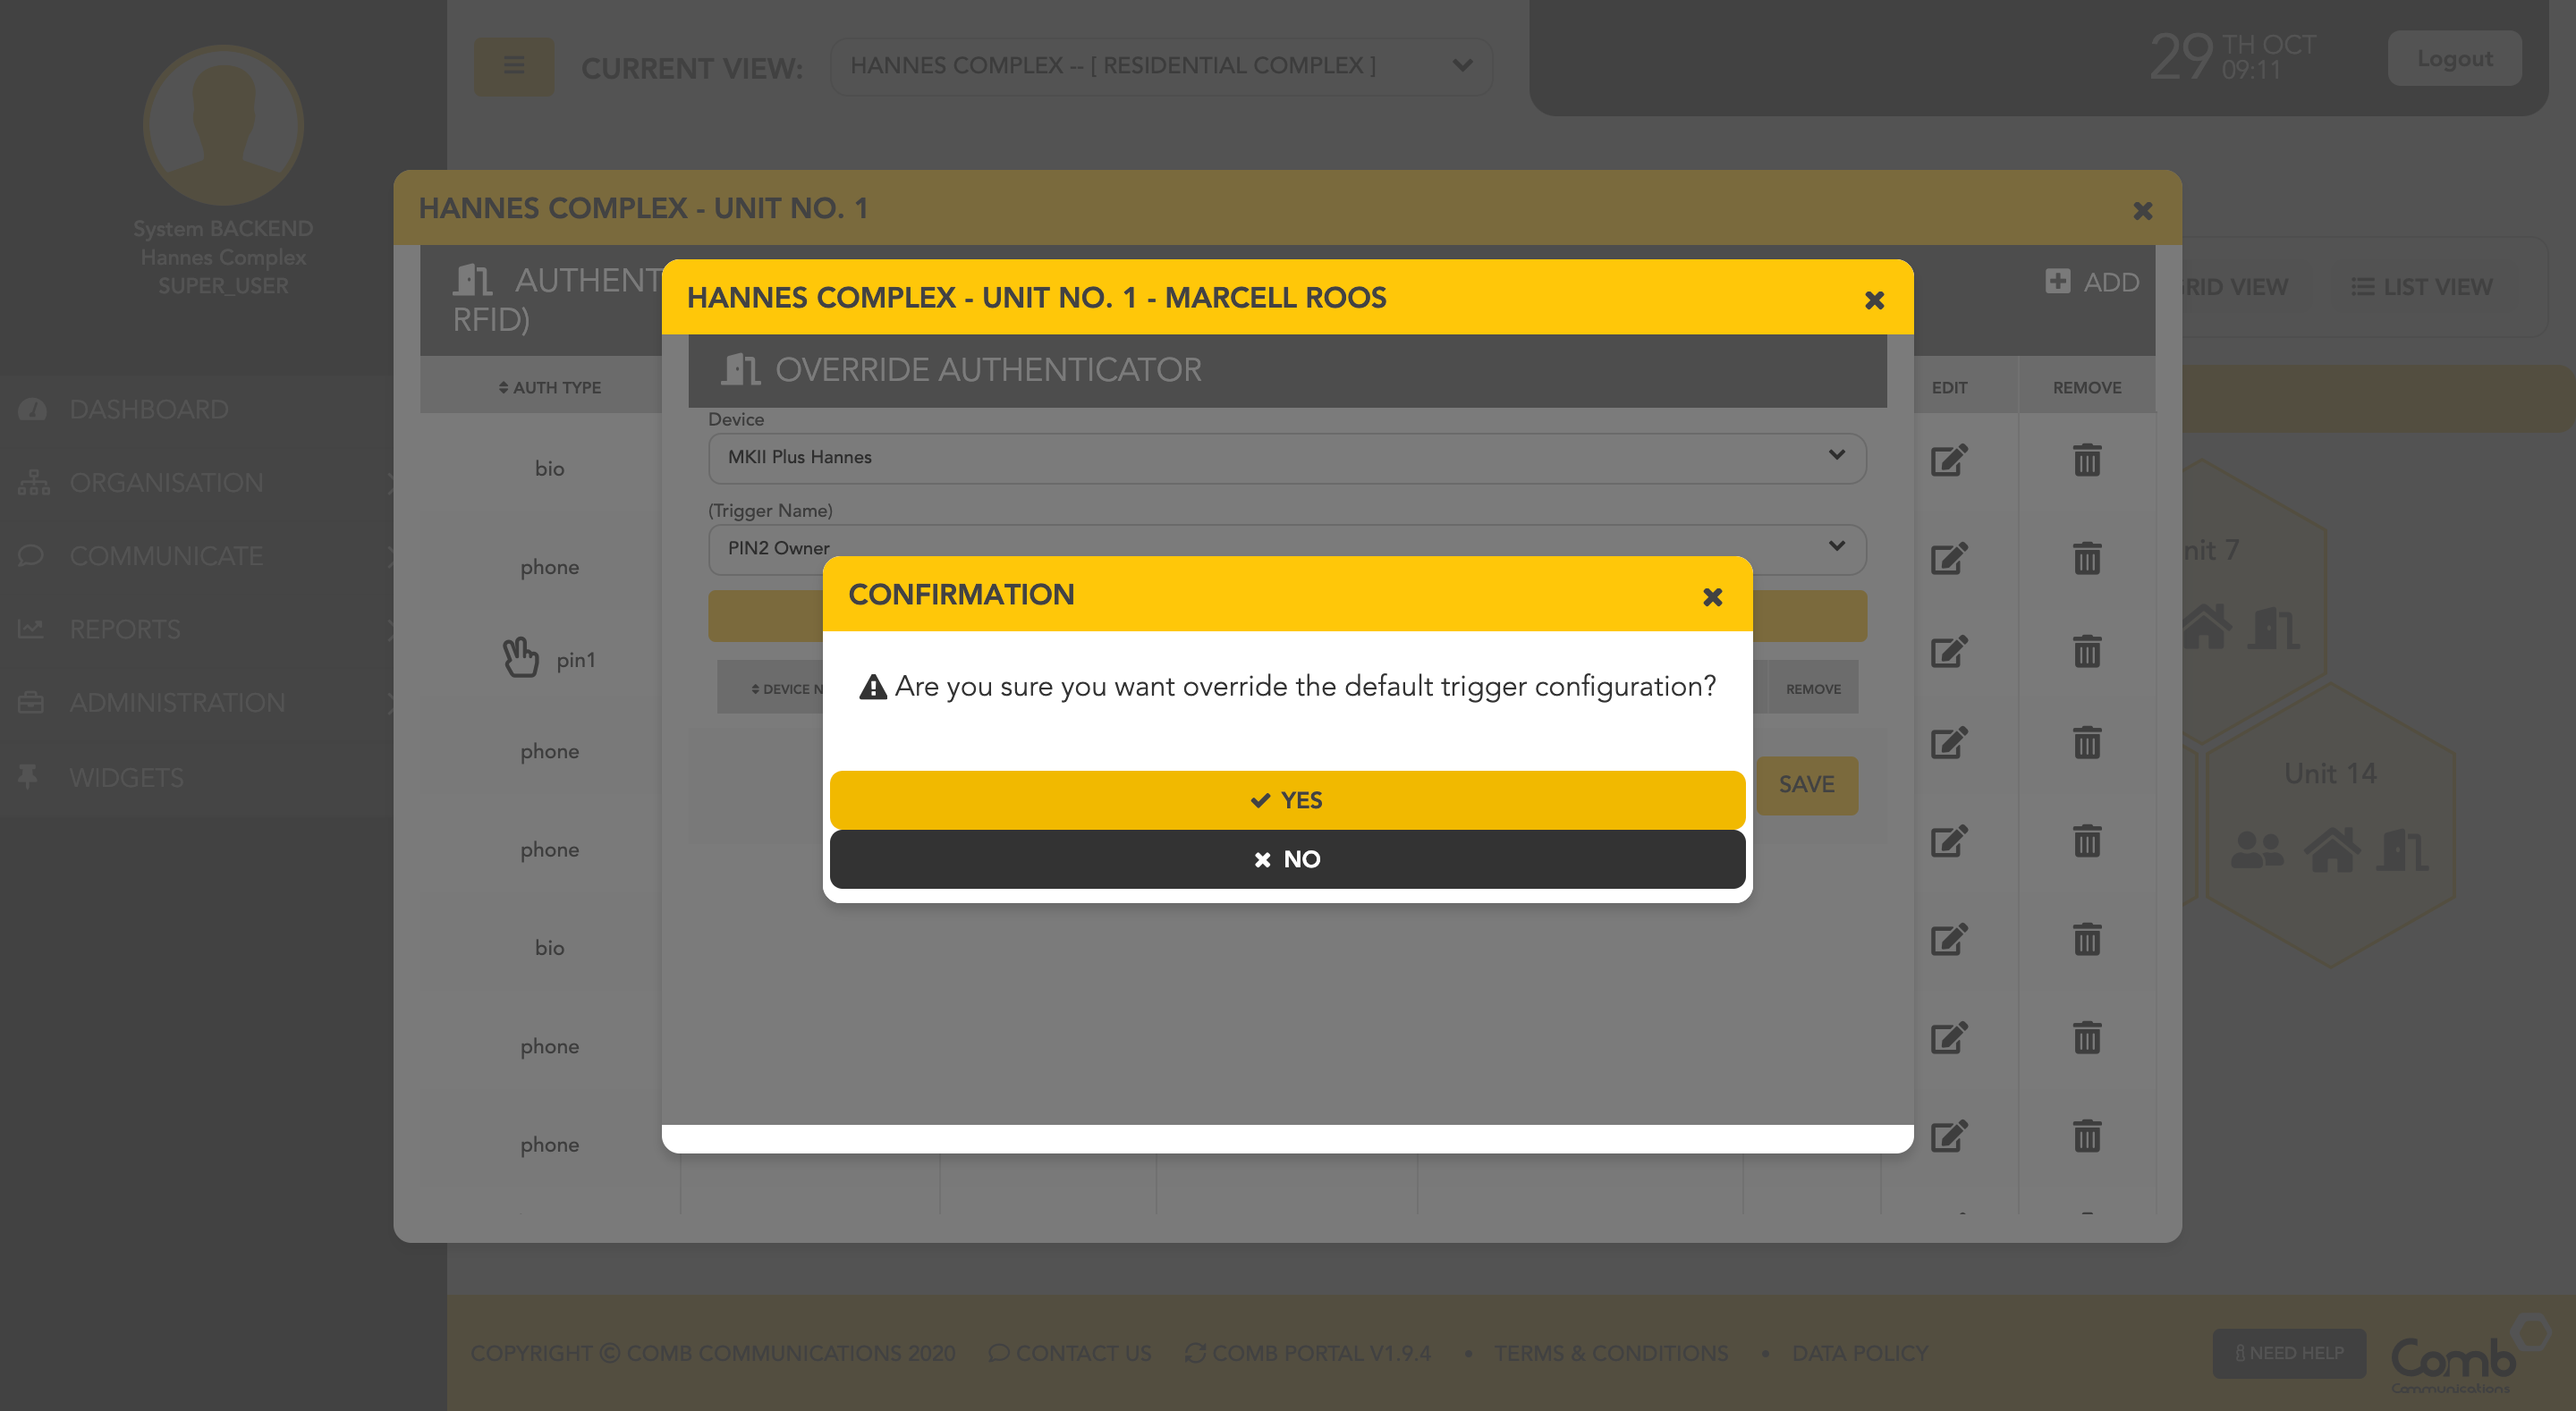
4: A confirmation alert will pop-up prompting if the user would like to override the default trigger configuration. Click "Yes" to continue.
5: The override trigger configuration will be added to the table as indicated below where the user can modify the triggers as desired. Users can edit the Triggers OVERRIDE TIME GRID, OVERRIDE QUALIFIER and OVERRIDE RELAY from the dropdown menus. A user can also remove a Trigger by simply clicking REMOVE OVERRIDE ICON. Once completed and happy, click the "SAVE" button to apply the changes and close the pop-up.
Congratulations! You have successfully overridden a trigger for a person in a unit!
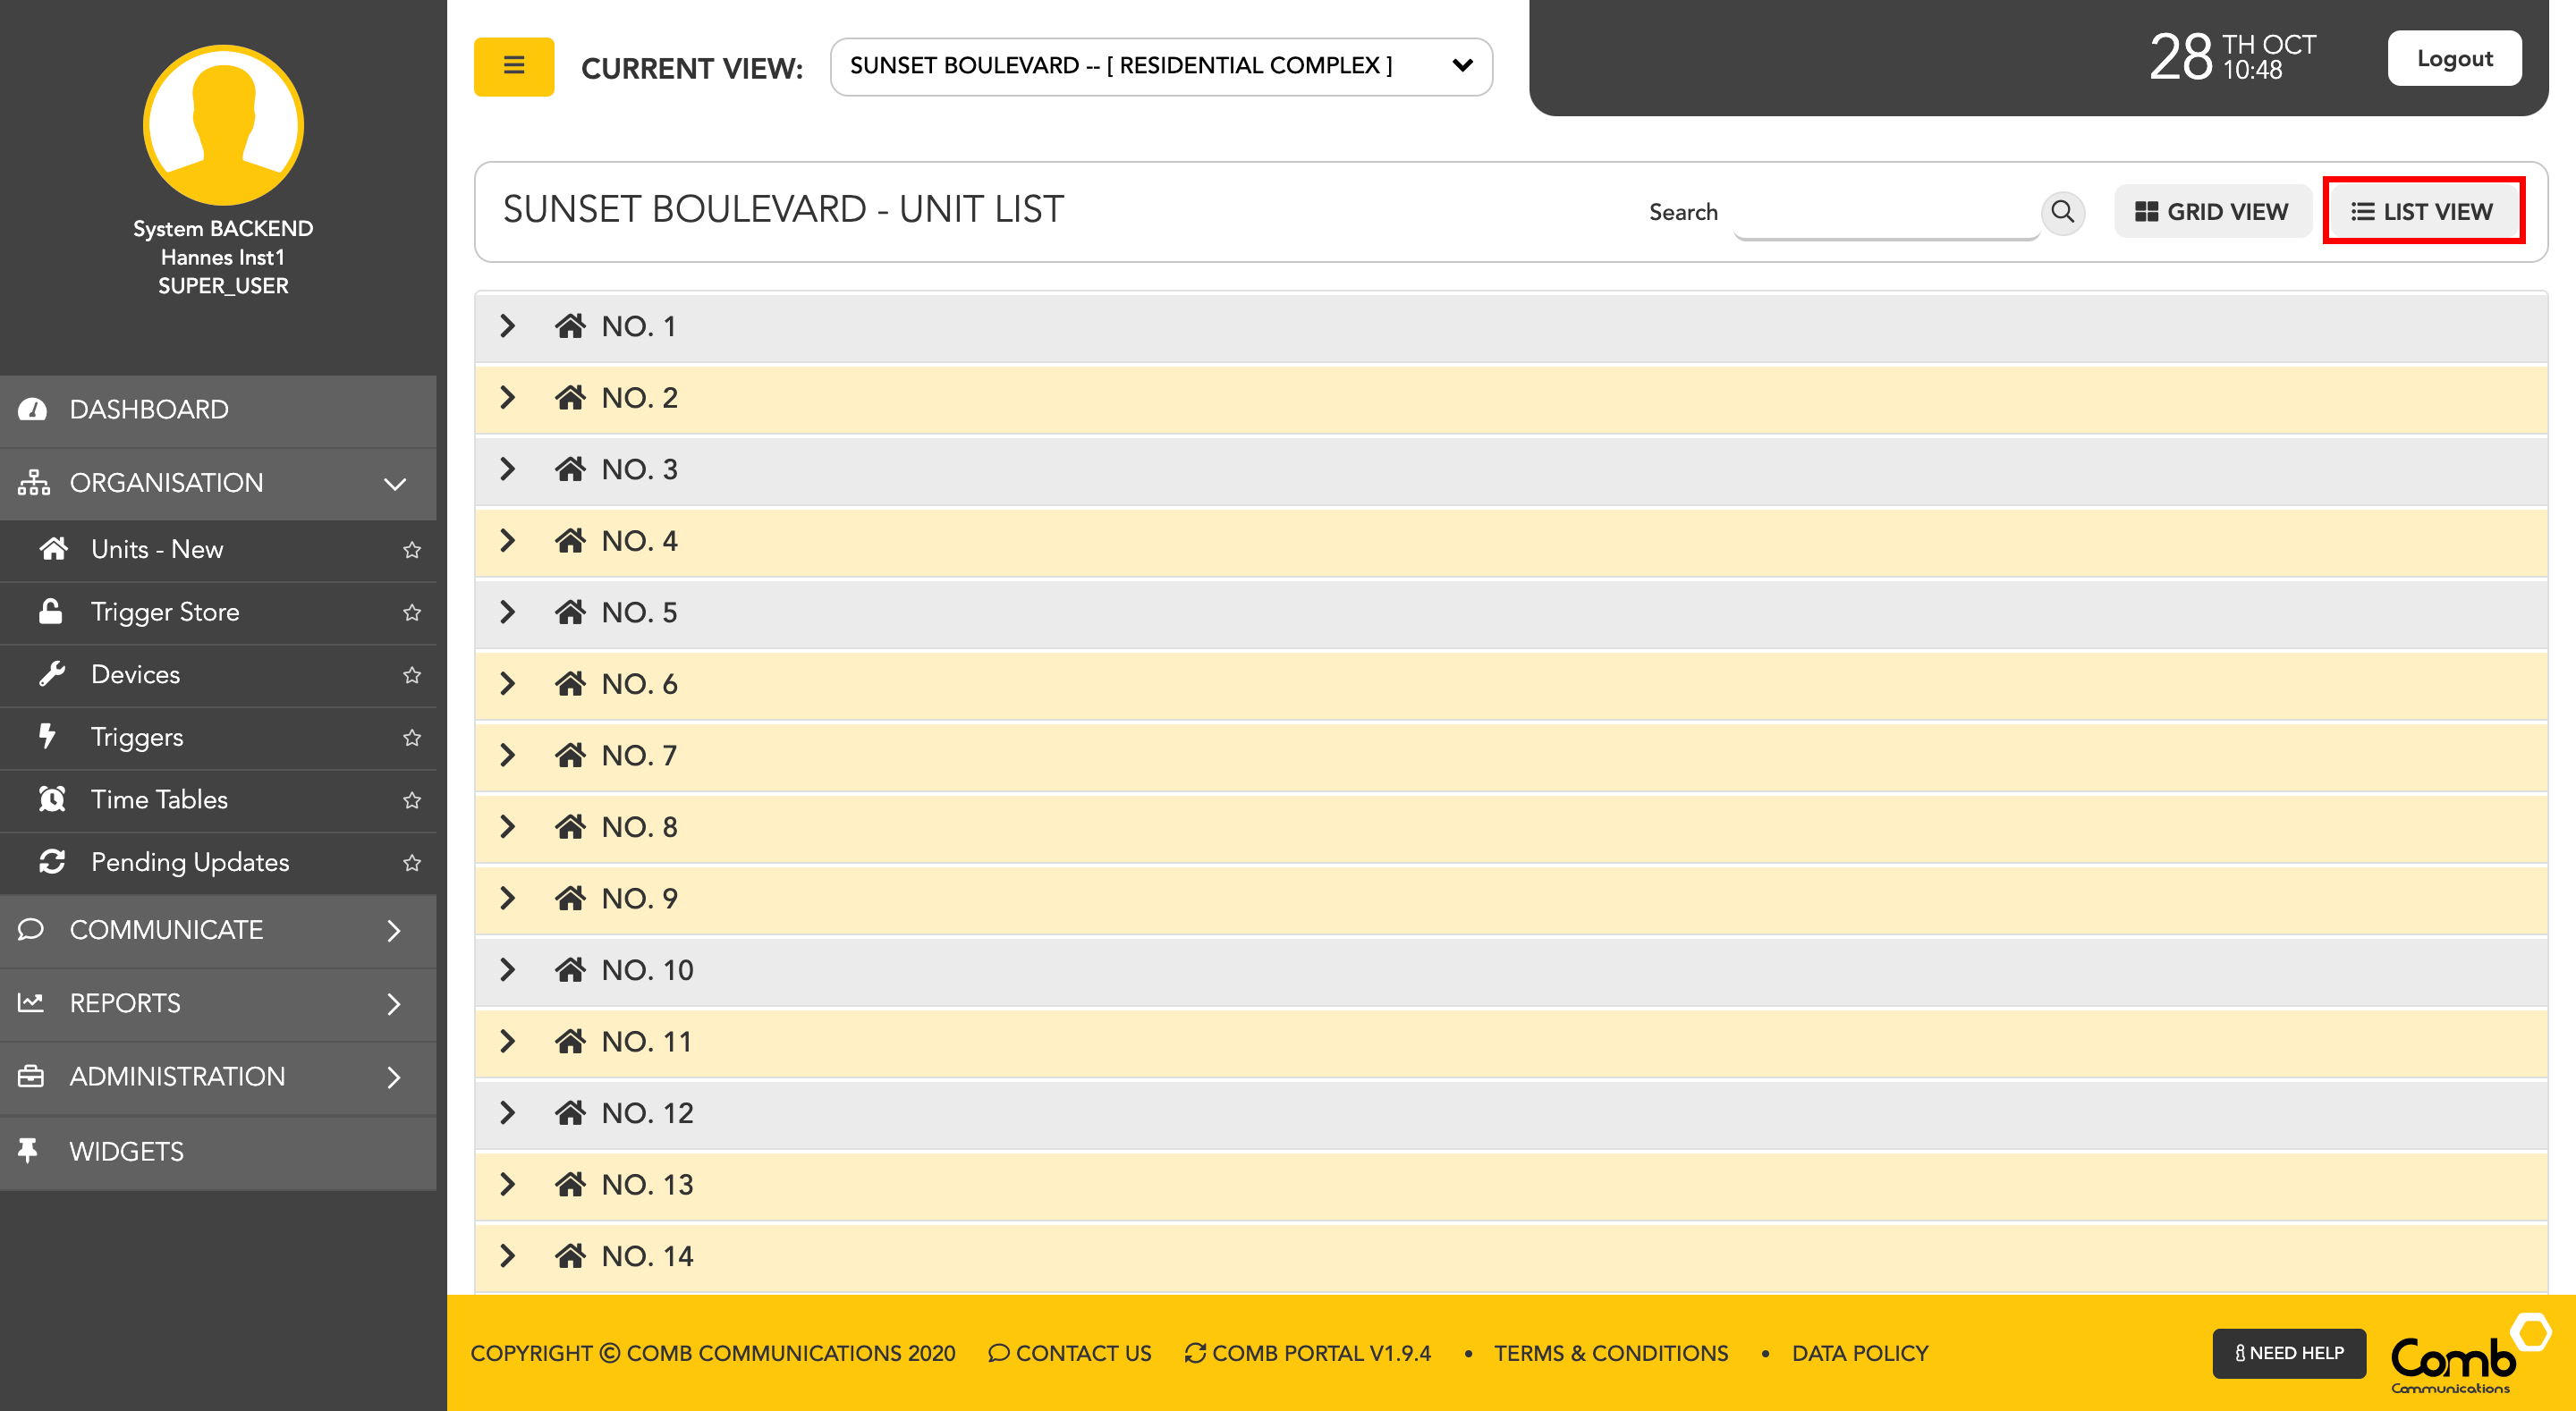
How to override triggers for a person in a unit using the LIST view.
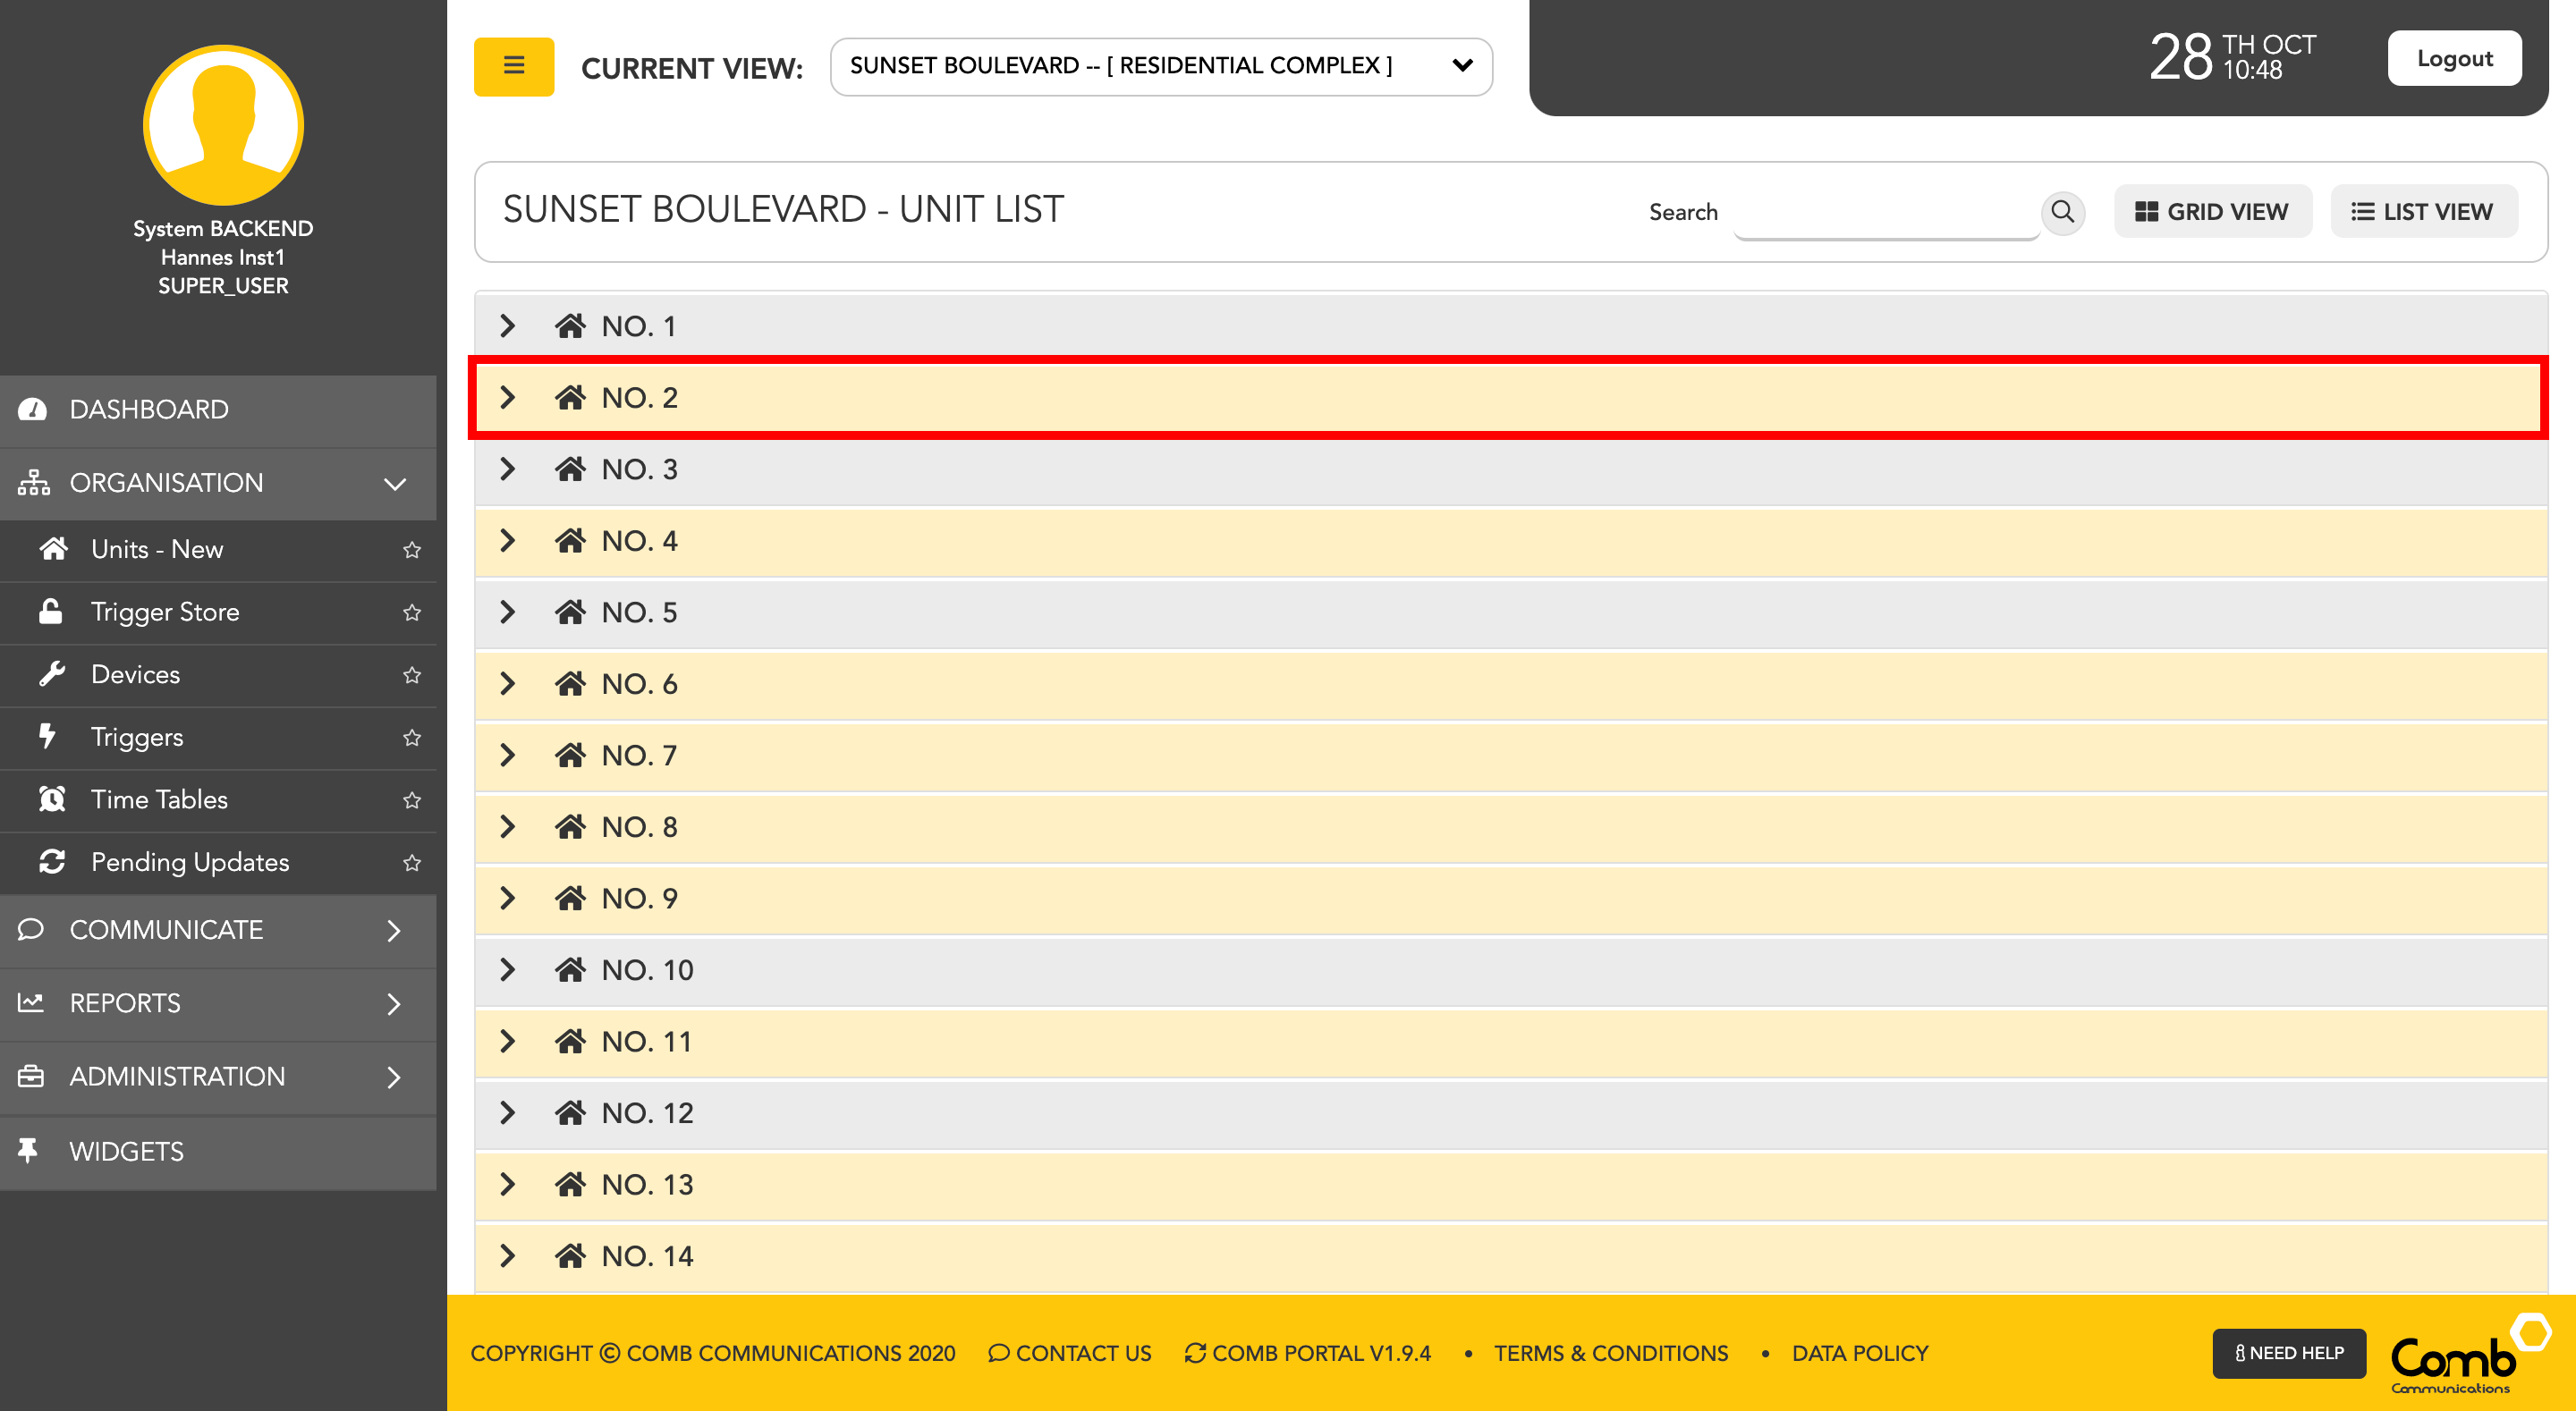
1: Click on a unit to open the accordion and view more information.
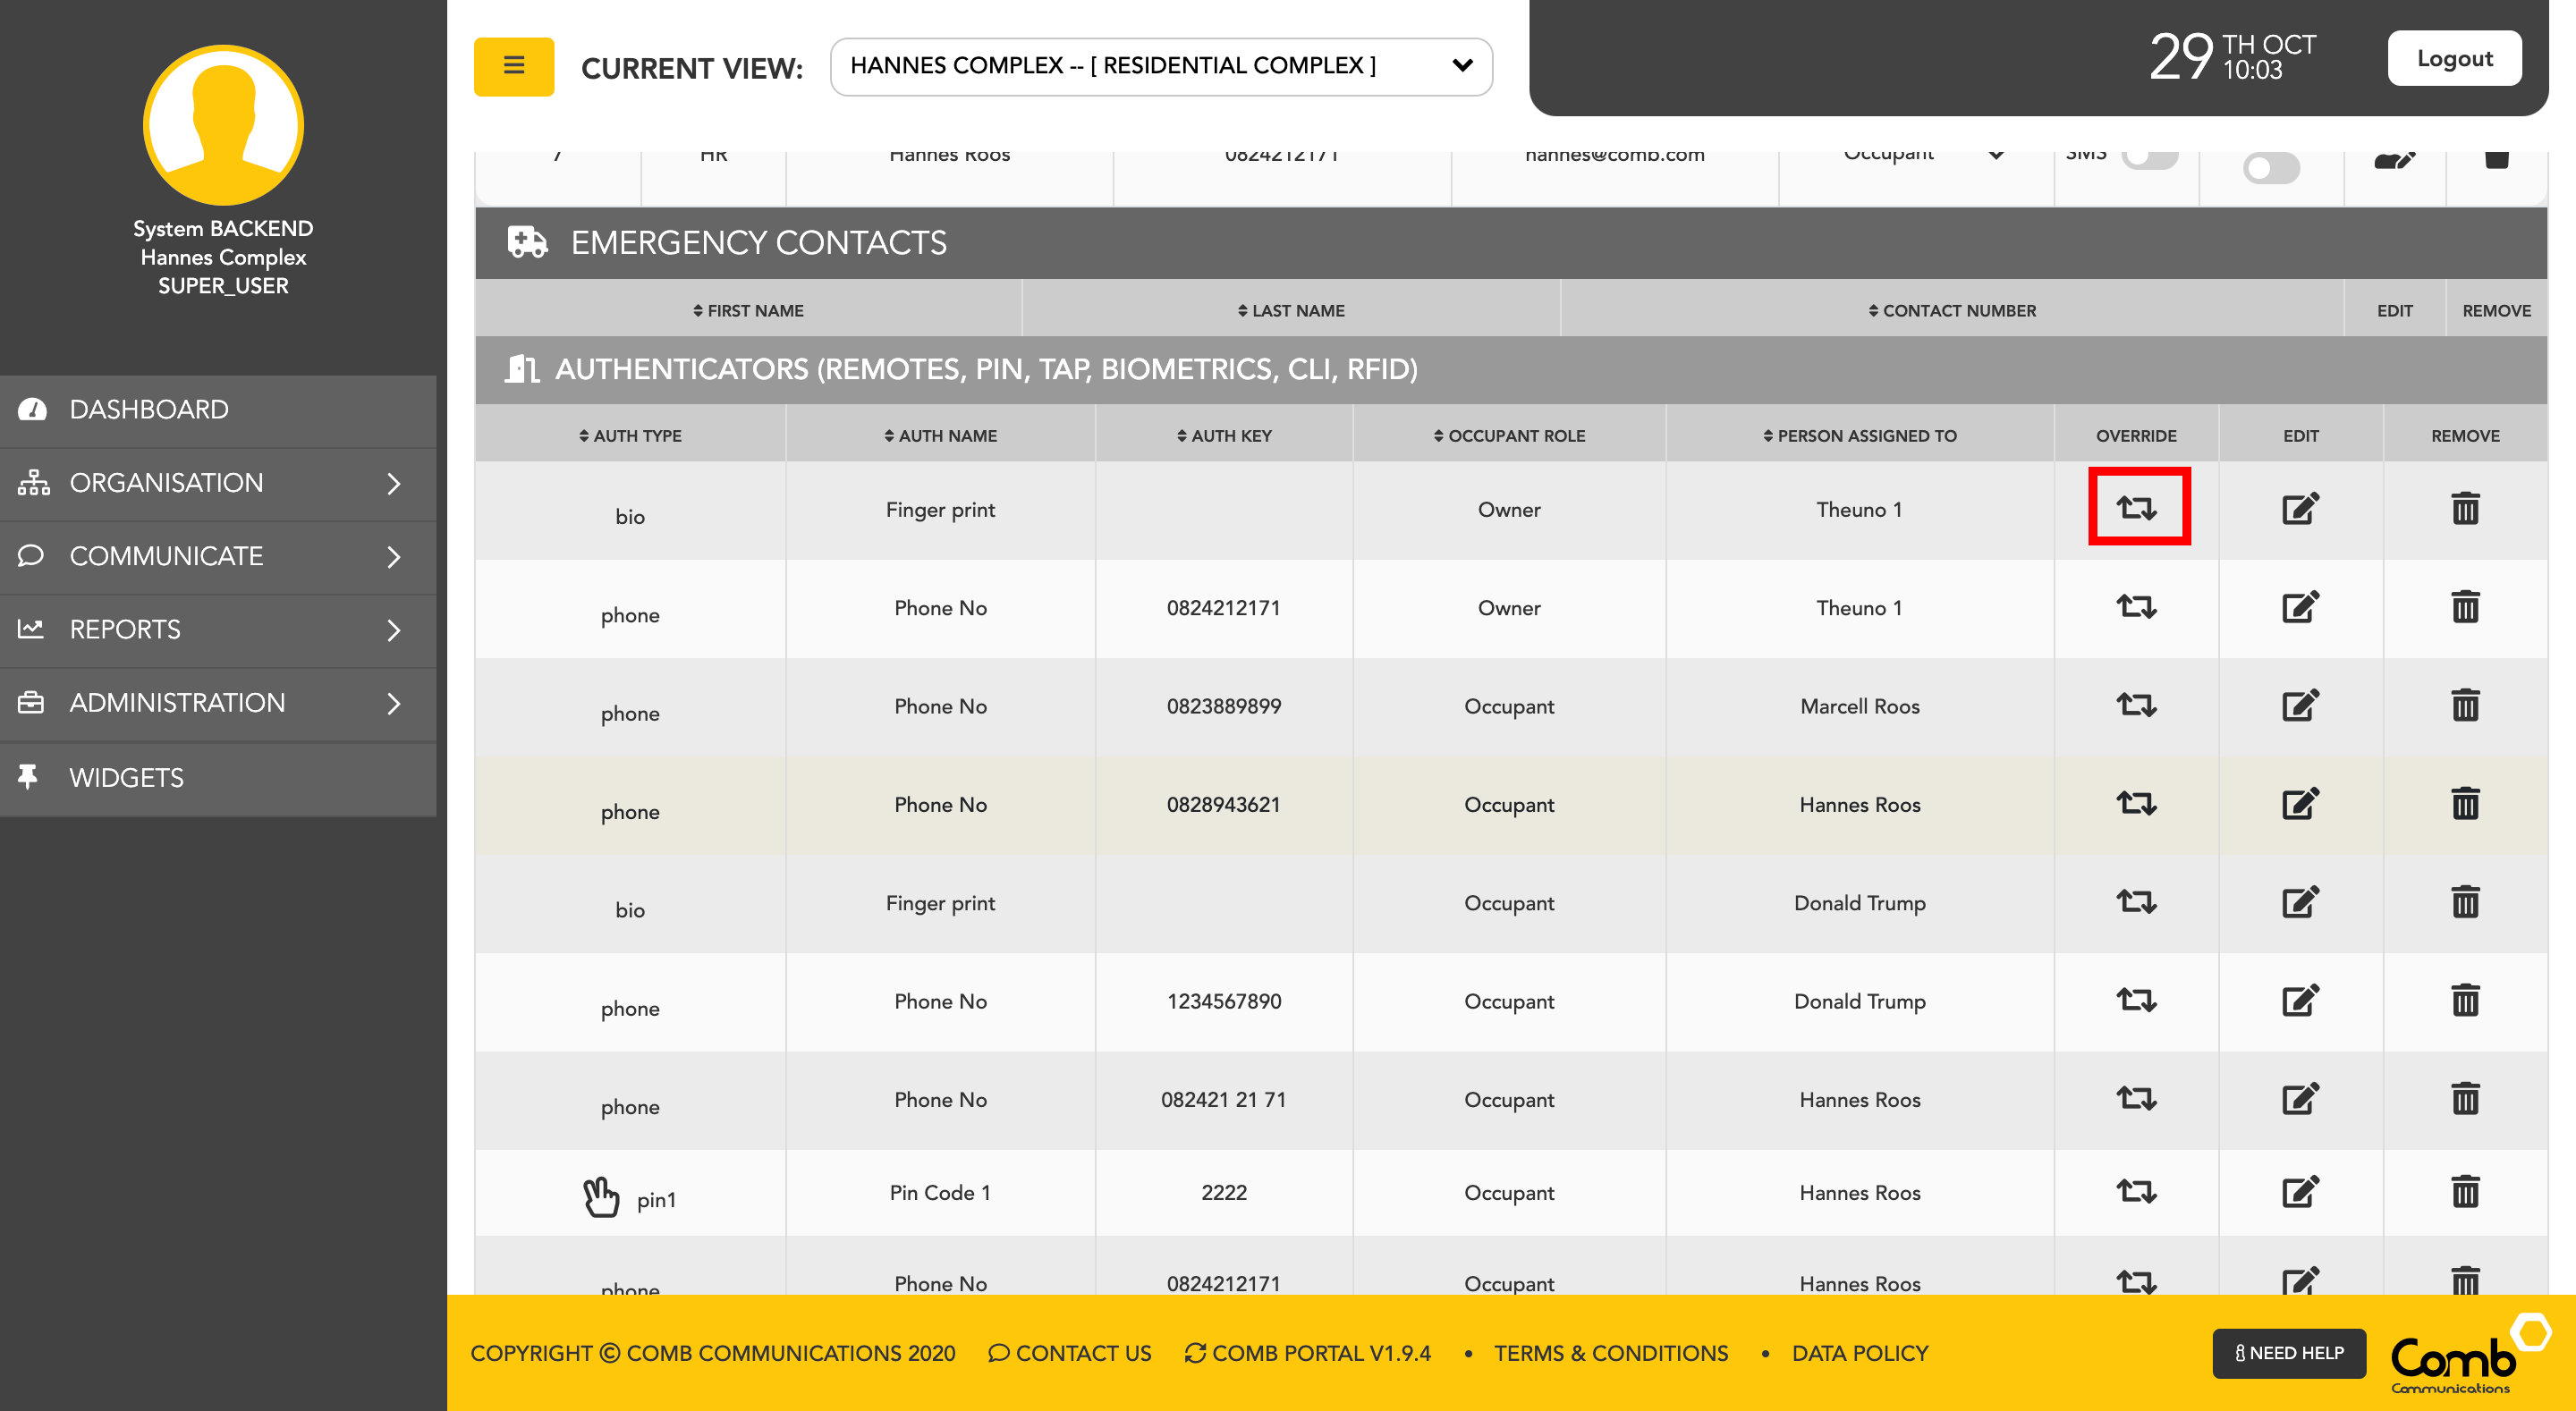
2: Scroll down to "Authenticators" and click the associated override trigger icon as indicated below. This will open the "OVERRIDE AUTHENTICATOR" pop-up based on the selected Authenticator.
3: Select the "Device" and the "Trigger name" from the dropdown menus. Once completed click the "+ADD OVERRIDE" button to continue.
4: A confirmation alert will pop up prompting if the user would like to override the default trigger configuration. Click "Yes" to continue.
5: The override trigger configuration will be added to the table as indicated below where the user can modify the triggers as desired. Users can edit the Triggers OVERRIDE TIME GRID, OVERRIDE QUALIFIER and OVERRIDE RELAY from the dropdown menus. A user can also remove a Trigger by simply clicking REMOVE OVERRIDE ICON. Once completed and happy, click the "SAVE" button to apply the changes and close the pop-up.
Congratulations! You have successfully overridden a trigger for a person in a unit!
Trigger configuration
Product Version
This document requires Comb Portal version 1.7.2 and greater.
Unless noted all "Intercom" references are for the MK II P/L device.
Glossary
| Word | Definition | Example |
|---|---|---|
| Trigger | A trigger is an event that causes an action to be preformed. | A button is pressed on a remote transmitter which results in a motorized gate to either open or close. |
Trigger Qualifier | A trigger qualifier is an attribute of the trigger. | Button two on the remote transmitter. |
| Timetable | A schedule of when an event can take place at a particular time. | A remote transmitter can only be used Monday to Friday between the hours of 08:00 to 18:00. |
| Role | A part played by a person in a particular situation. | The owner of the remote transmitter is the occupant of the unit in the complex. |
| Relay | Is a device that is activated by a trigger. | Relay 1 is connected to a motorized vehicle gate. |
Trigger Types
| Trigger Type | Trigger Qualifier |
|---|---|
| DTMF | Digits 0 to 9. |
| Remote | Buttons 1 to 6. |
| PIN 1 | Not Applicable, channel A, B, intercom keypad or peripheral device. |
| PIN 2 | Not Applicable, channel A, B, intercom keypad or peripheral device. |
| CLI | Not Applicable. |
| TAP | Not Applicable, channel A, B, intercom keypad or peripheral device. |
| TAPEX | Not Applicable, channel A, B, intercom keypad or peripheral device. |
| Scanner | Driver or vehicle license. |
| Biometrics | Biometric |
Note:
- The peripheral device is only available with TAP TAP Keypad running firmware greater than 2.0.1. See TAP TAP Installer Guide.
- Before any triggers can be configured for TAP TAP keypad with an ID, the keypad must be first wired up to an intercom, configured with an ID, and the intercom synchronized with the back end server.
Relays
| Device Type | Number of relays |
|---|---|
| MK II BB | 4 |
| MK II P/L | 5 |
| TAP TAP Keypad (FRX) | 1 |
Roles
| Role | Description |
|---|---|
| Owner | A legal entity that owns the property. |
| Occupant | A legal entity that is currently residing in the unit. |
| Worker | A person who provides a service to the Owner/Occupant. |
How to define a trigger
A trigger is made up of eight properties.
| Property | Description | Example |
|---|---|---|
| Name | This is a user-friendly name to quickly identify the trigger | Vehicle Gate South Road |
| Device | The name of the device that the trigger will be allocated to. | South Road Intercom |
| Type | One of the defined triggers types. | DTMF |
| Qualifier | An attribute for the trigger type | Digit 6 for DTMF |
| Direction | This property is not used at the moment. | |
| Relay | The required relay to be activated. | Relay 2 |
| TimeGrid | The day and time when the trigger is valid | All Times |
| Role | The role type. | Occupant |
Notes:
- For CLI to work the telephone number must be loaded on the website.
- If the incoming call is set to "Latch relay" and CLI is set to on, the trigger will follow what is setup under trigger configuration.
- If the incoming call is set to "Latch relay" and CLI is set to off, the trigger will activate the configured relay in the components setting.
- For trigger type PIN and TAP, there are extra configuration settings found under the "Component" setting for devices.
- Intercom keypad and Channel A are by default TAP (Incoming) channels.
- Channel B is by default TAPEX (outgoing) channel.
- Channel A and B, if configured, will override the relay defined in the trigger setting.
- Channel A and B are configured in "Device → Quick Action → Components→ TAPEX 1".
- If TAP is not enabled, Channel A and Channel B are set by default to 'None'.
- PIN 2 trigger must first be defined otherwise the PIN 2 input box is not displayed in the Unit configuration screen.
- Two or more TAP TAP keypads on the same channel cannot trigger different relays.
- Two or more TAP TAP keypads with different configured ID's on the same channel are able to trigger different relays.
- TAP TAP keypads can have the same ID.
- TAP TAP keypads with the same ID on different channels cannot trigger different relays.
- The FRX relay is located in the TAP TAP keypad housing.
- Selecting the FRX relay on Comb Portal Website disables the intercom relays.
- The FRX relay will always be triggered if a valid PIN, TAP, and TAPEX code is entered on the TAP TAP keyboard.
- The FRX relay cannot be triggered by a valid DTMF, remote, CLI, or PIN/TAP's code entered on the intercom keypad.
Version 2.0.1 TAP TAP firmware
From this version, the TAP TAP keypad can be programmed with an ID. See TAP TAP Installer Guide for instructions on how to program the keypad with an ID.
Related content
© 2018 Comb Communications. All Rights Reserverd.
http://www.comb-communications.com